4ZeroBox
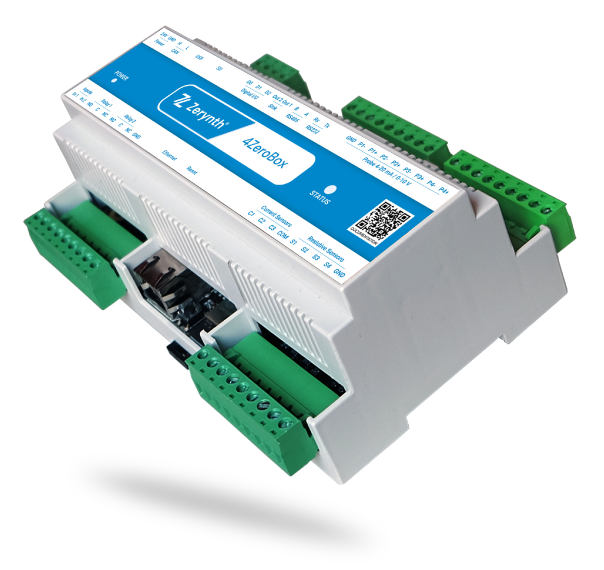
Unboxing Time!
Inside the box, you will find the
- 4Zerobox
- terminal connectors
- Warnings and instructions manual
1. Create a project
First, you need to install the Zerynth SDK.
Let's create a new project, you can create a new project from scratch by pressing Ctrl+Shift+P and entering the command New Zerynth project.
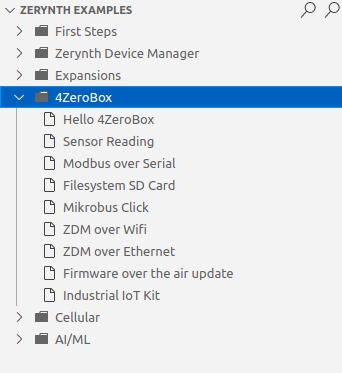
Zerynth SDK also provides a lot of examples that can be easily cloned and used as a starting point for a new project.
Just press Ctrl+Shift+P and type examples in the popup that VSCode displays.
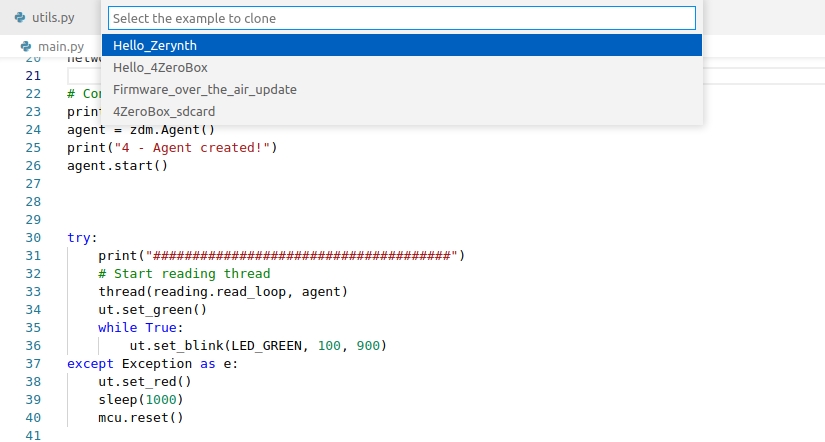
Simply choose Zerynth > Search examples and then type Hello. Select the Hello_4Zerobox example and provide a folder to clone in. When ready, click Clone Zerynth Example and you are good to go.
2. Connect and configure the 4ZeroBox
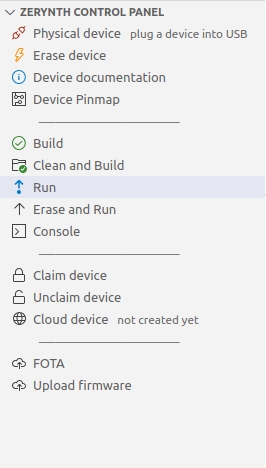
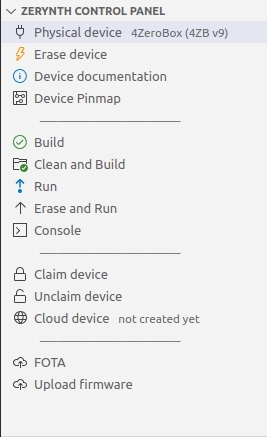
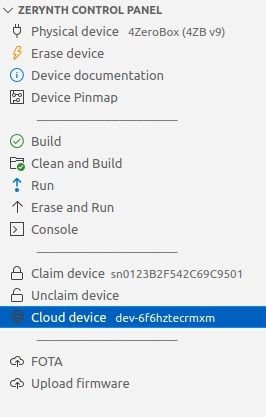
Connect the 4ZeroBox to the PC. The VSCode extension provides a panel labeled Zerynth Control Panel that contains information about the current project.
Press Physical Device and if necessary, the extension will ask which board is connected.
3. Run the example
Check the project for errors by pressing Build. If everything is ok, you can press Run. The Zerynth SDK compiles the source files, creates a binary firmware and burns it to the ZM1-DB.
After the compilation and flashing, the terminal should show the serial output
Hello Zerynth 4ZeroBox!
Hello Zerynth 4ZeroBox!
Hello Zerynth 4ZeroBox!
Hello Zerynth 4ZeroBox!
Hello Zerynth 4ZeroBox!
Hello Zerynth 4ZeroBox!
4. Connect to the cloud
Connecting your devices to the cloud is very easy with zerynth platform. You don't need to know security, protocols or certificates, in minutes you will be sending your data to the cloud in a secure way and Zerynth OS will handles all of these details. To connect your device to the cloud, you have to claim it. It must be done only once, it's just a click and gives you control over the device forever (or until you decide otherwise otherwise by pressing unclaim).
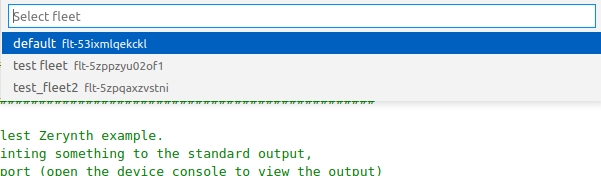
Just click claim device in the Zerynth Control Panel. You will be asked to
- choose which fleet you want to register your device to.
- Create a new cloud device for this board.
- Accept the provisioning firmware (the existing firmware will be overwritten).
- After provisioning, the terminal should output "Claim finished successfully". if you click on cloud device section, you will be directed to the device page in Zerynth Cloud.
The next step is to clone zdm over wifi example, from the examples tab on the left, clone the example.
Change the SSID and PASSWORD in the code according to your wifi network settings, choose the hardware type from the Zerynth control panel and then Run the code.
The terminal should state the connection status. Let's click on the cloud device in the zerynth control panel to check the device status.

To see the recieved data, go to the console section in your device page in Zerynth Cloud.
5. Hardware details
If you want more information on the features, pinmap or the user manual, Please refer to the hardware page.
6. Explore Zerynth!
Zerynth can do much more than a simple Hello World, for additional examples refer to:
- The examples tab in Zerynth extension.
- Tutorials.