Getting Started
Welcome to this guide on how to get started with the Zerynth Edge Layers components configuration. This guide aims at introducing Zerynth users to the requirements and needs for getting started with the configuration and setup of the Zerynth Edge Layers components. The Zerynth Edge Layers components are a set of software and hardware components that enable connecting industrial machinery and assets to the Zerynth Platform.
In this guide, you will learn how to:
- Install the necessary software on your machine, such as Docker, Google Chrome, and Zerynth Toolbox in order to be able to configure software and hardware components of the Zerynth Edge Layer.
- Create a new machine on the Zerynth Platform using a multiple kind of templates that adapt to different case scenarios.
Installator PC Hardware Requirements
Hardware virtualization must be enabled in BIOS. For more information, see Virtualization and Virtualization from BIOS;
Docker is required only for executing the 4ZeroAgent on your PC, if you want to just program Zerynth Edge Devices from your PC, Docker is not mandatory;
- A Machine with:
- 64-bit processor with Second Level Address Translation (SLAT);
- 4GB system RAM
- Windows 10 or Windows 11 installed;
- Having Docker Installed and working on the machine (link to download);
- Having Google Chrome Installed (link to download);
- Having the required driver for Windows installed. Follow the guide here.
Configurator
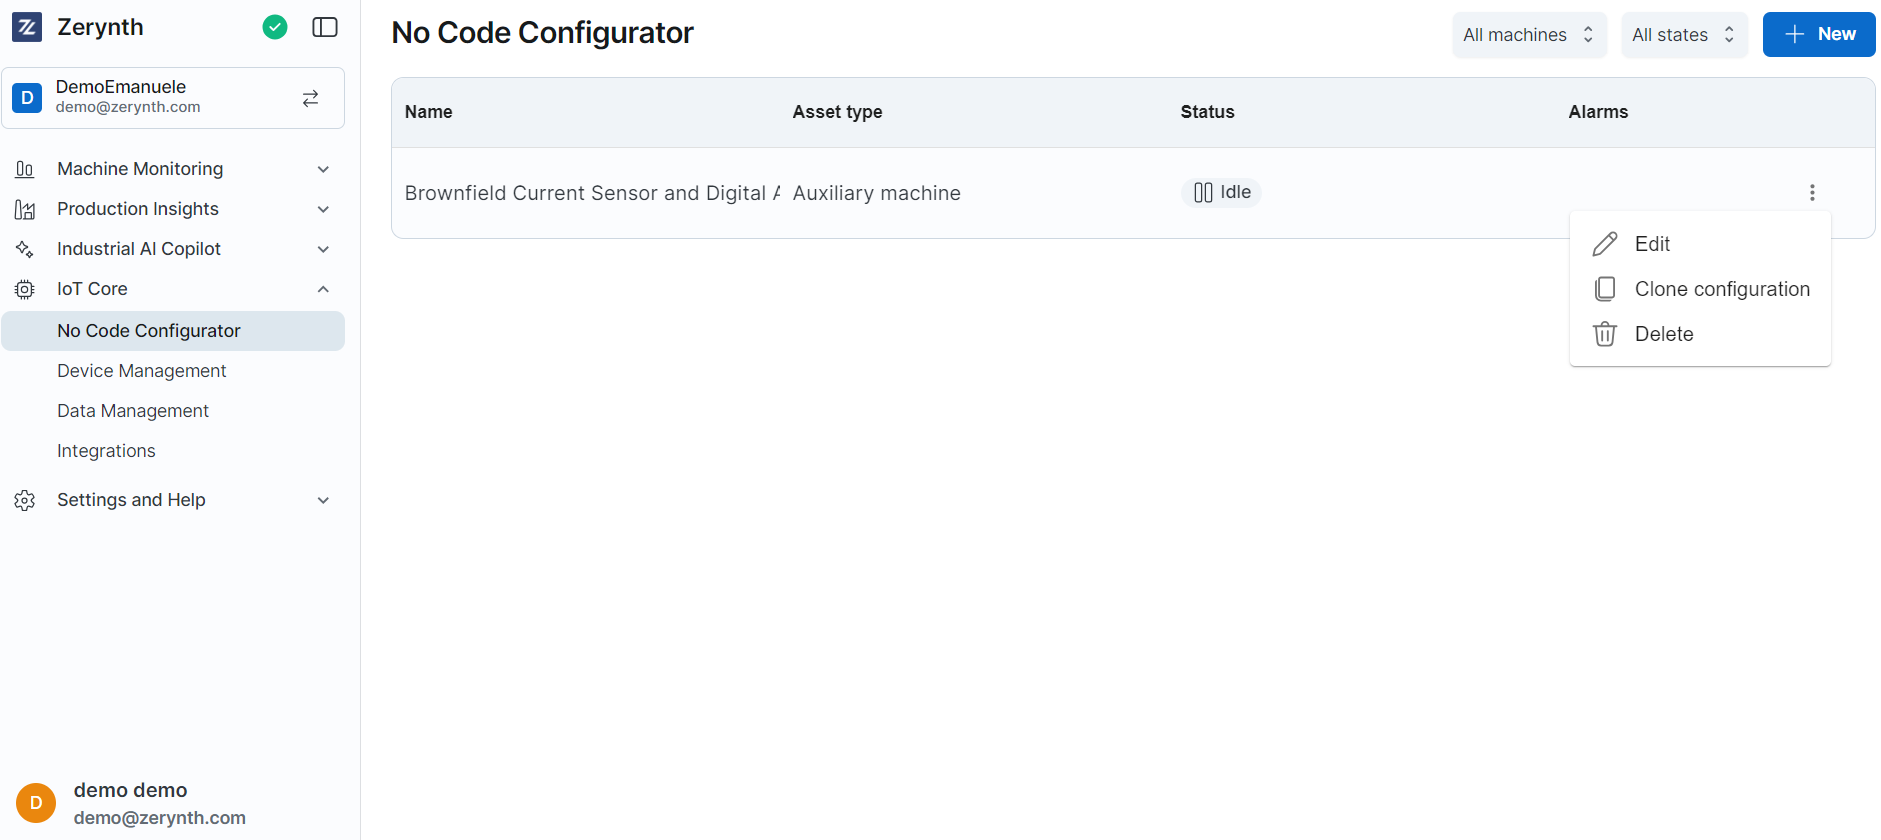
The Configurator Tool allows you to create and add new devices to your account, and to configure them to analyse only the data that is relevant to you.
To register a new machine, you can manually launch the Configurator, which is now located within the "IoT CORE" tag in the new sidebar menu.
Additionally, it is important to note that the No-Code Configurator allows for editing the names of already registered machines and electrical panels. f you want to edit the name of a machine after it has been installed, click on the "Edit" button located on the right side. To clone a template for installing a new machine, use the "Clone" button.
New Configuration Page
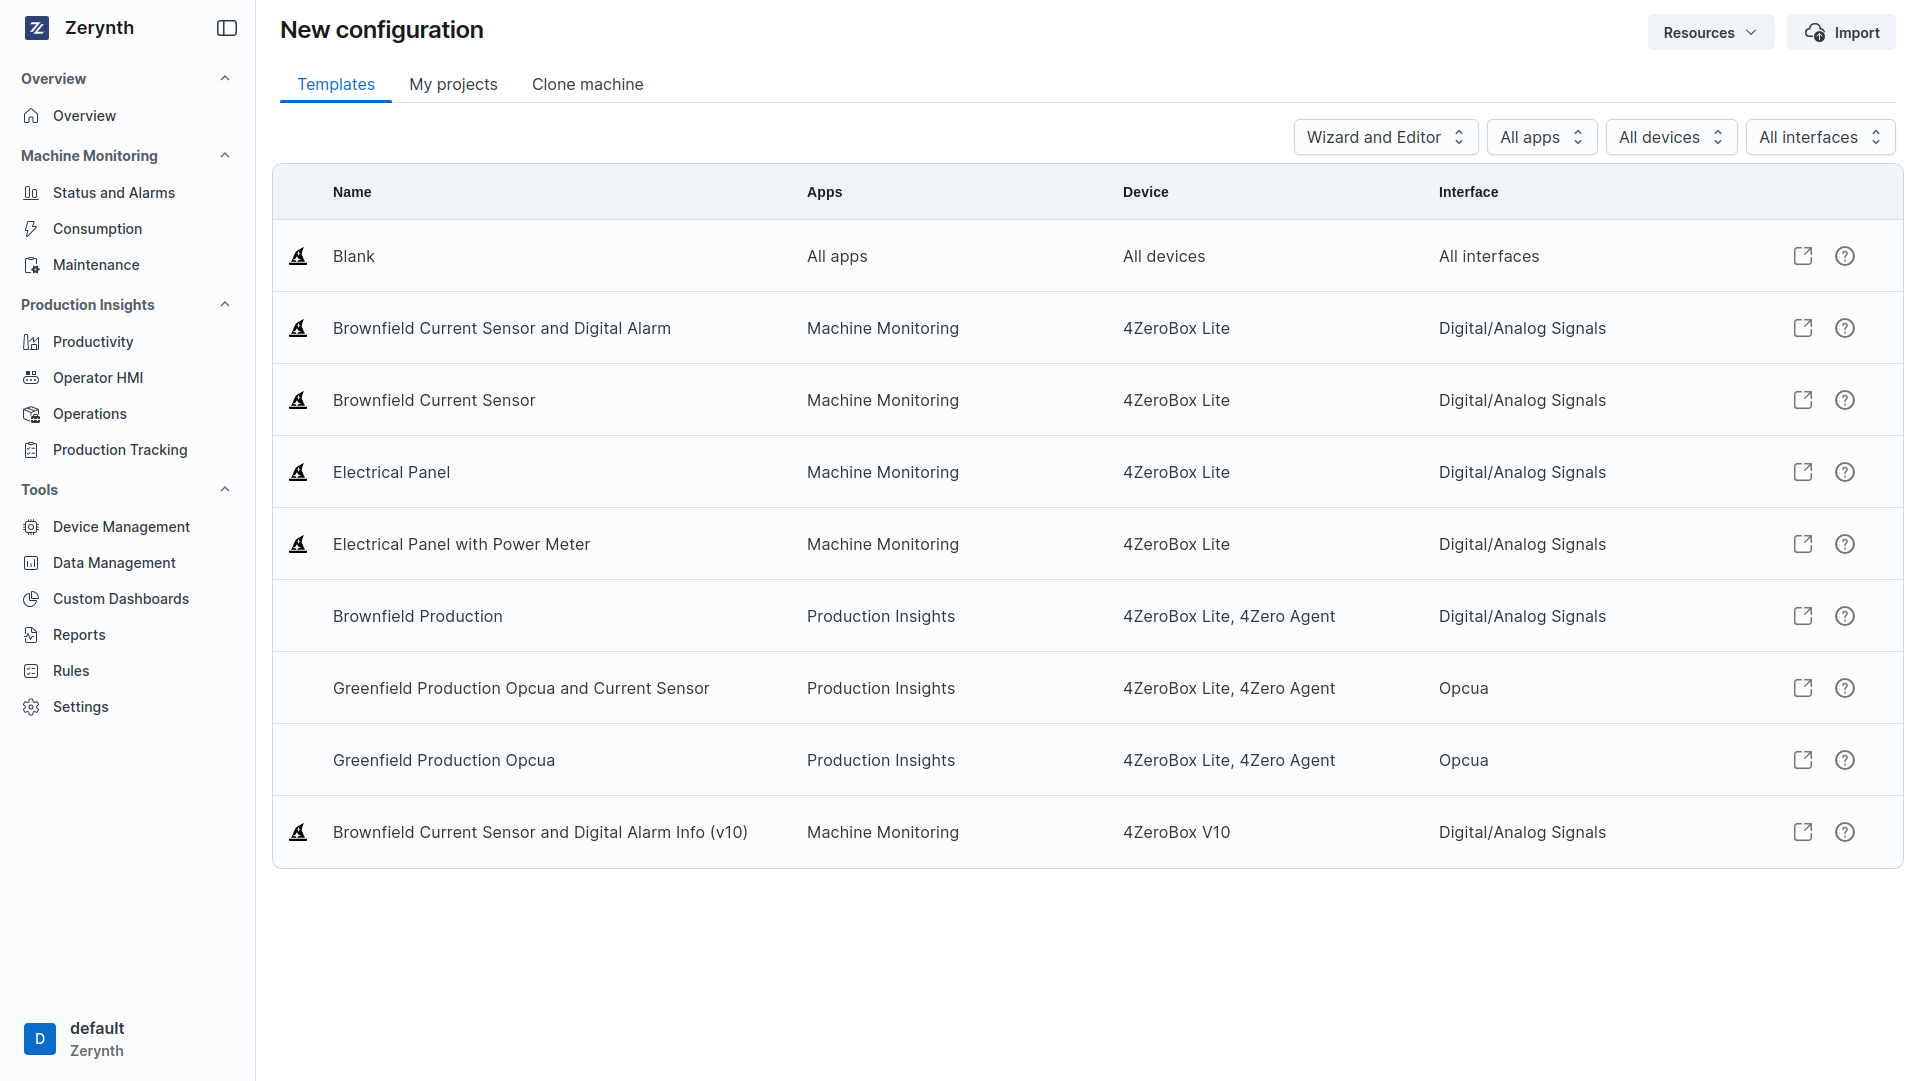
After clicking the + New button you will be redirected to the "New Configuration" page. Here you can find a list of templates that you can use to create your configuration.
Some templates support the Wizard Mode, which allows you to configure your device in a few simple steps. The Wizard Mode consists of a series of steps that guide you through the configuration process. You can decide to switch to the Advanced Mode at any time, which allows you to configure your device in a more detailed way, by using the Graph Editor.
If you convert a configuration from Wizard Mode to Editor Mode you will not able to switch back to Wizard Mode.
Once you have opened the Configurator Tool, you can choose the template that best suits your needs. You can search the template that you want filtering by the following parameters:
- Wizard Or Editor: the type of configuration mode that you want to use.
- Supported IoT App: the Iot App that you want to connect with your device to.
- Supported IoT Device: the IoT Device that you want to connect with your device to.
- Supported Interface: the type of machine you want to connect to.
In this page you can also quickly access to the documentation, in the top right corner of the page, by clicking on the Resources button. Here you can find the link to the Zerynth Documentation, the link to the Wiring Guide, the link for the download of the Zerynth Toolbox and for the Windows Driver.
Templates
- Blank: The blank template allows you to create a new configuration from scratch, you can choose if create the configuration using the Wizard Mode or the Graph Editor.
- Brownfield Current Sensor and Digital Alarm
- Brownfield Current Sensor
- Electrical Panel
- Electrical Panel with Power Meter
- Brownfield Production
- Greenfield Production Opcua and Current Sensor
- Greenfiled Production Opcua
- Brownfield Current Sensor and Digital Alarm Info (v10)
You can also access to My Project page by clicking on the specific tab, here you can find all of your custom templates that you have created. You can use them to create new configurations.
The Clone a Machine page allows you to create a new configuration starting from an existing one.
For using a template, you have to click on the Use button, that appear when you hover the mouse on the template.
Industrial Machine Connection
Connection of Brownfield Machines
Let's explore the process of connecting a Brownfield Machine to the platform using an example.
Example: Configuring a brownfield machine
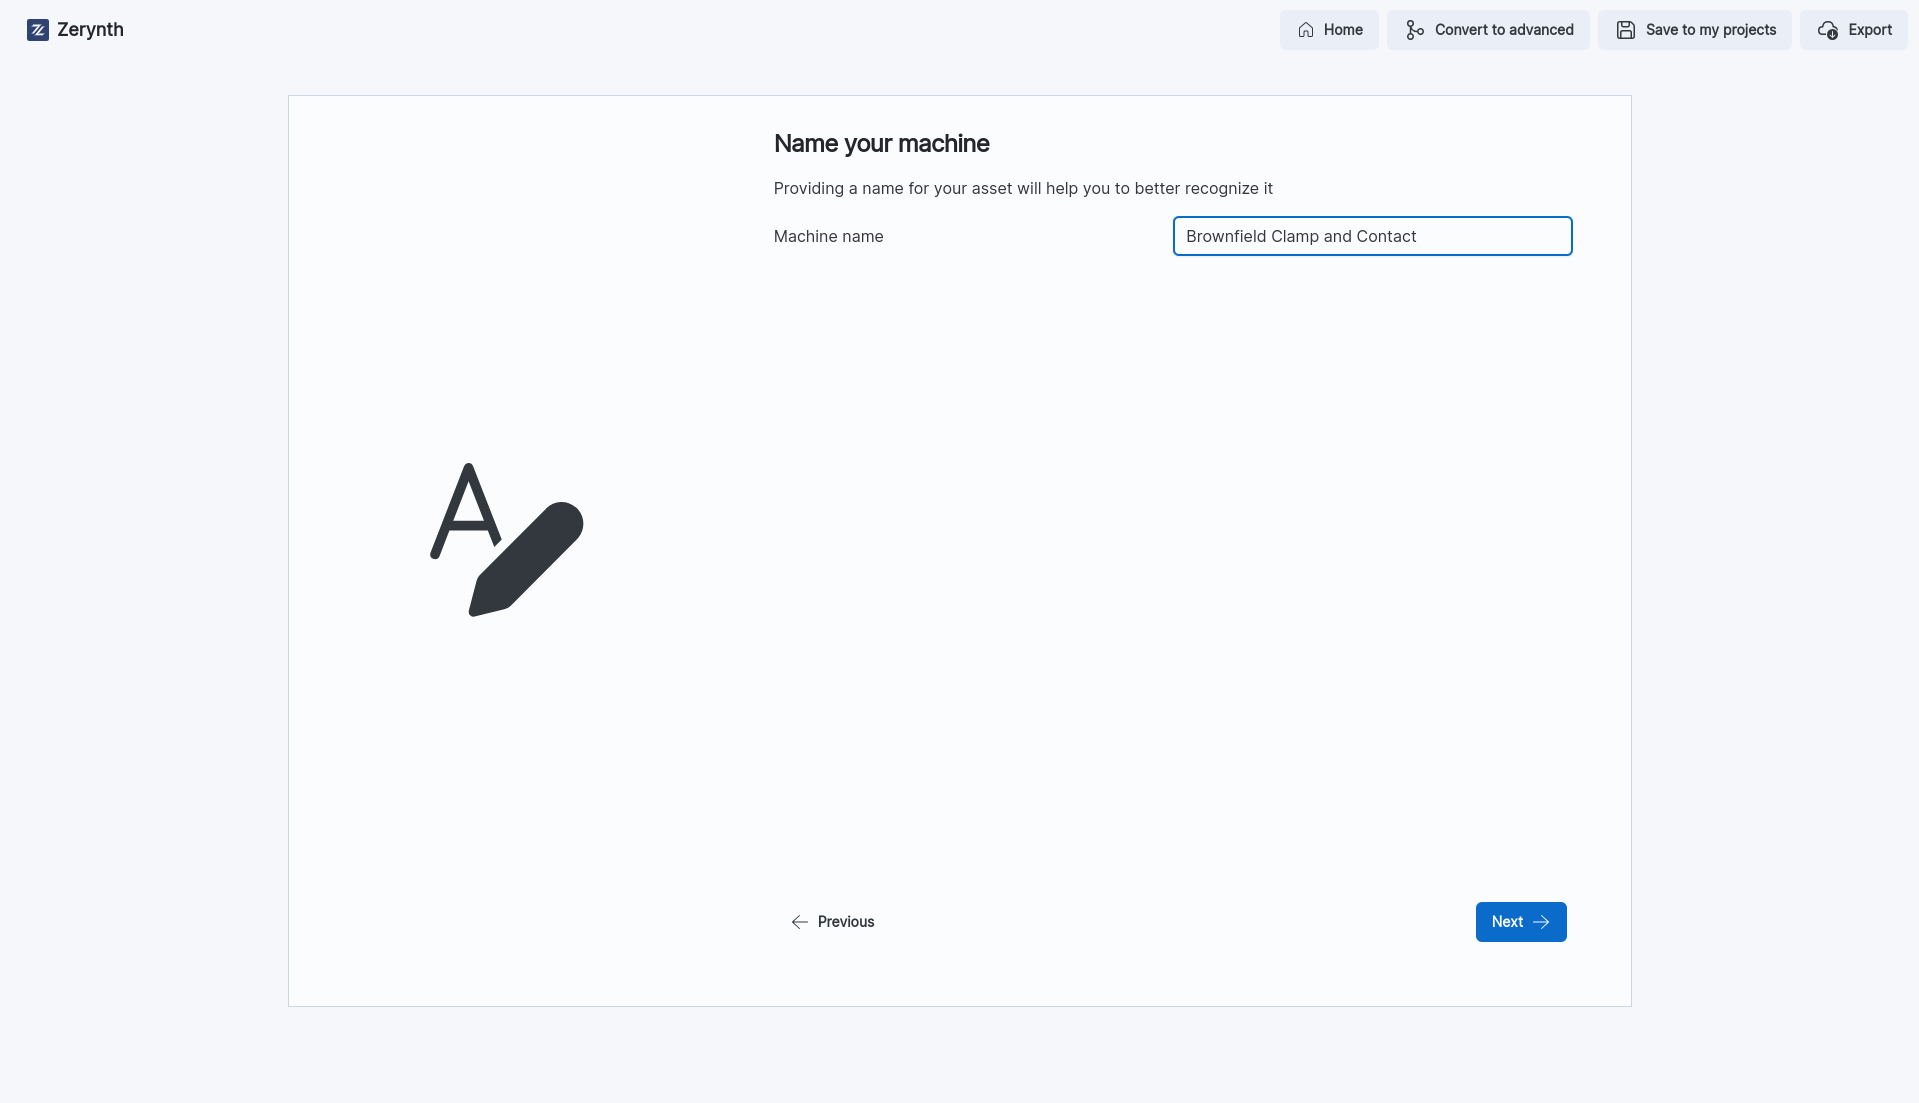
- Select the Template: We select the template that we would like to use, in this case we select the template Brownfield Current Sensor and Digital Alarm that support the IoT app Machine Monitoring.
This template support the wizard mode, so we can configure our device in a few simple steps.

-
Name: The first step is to choose the name that we want to assign to our device.
-
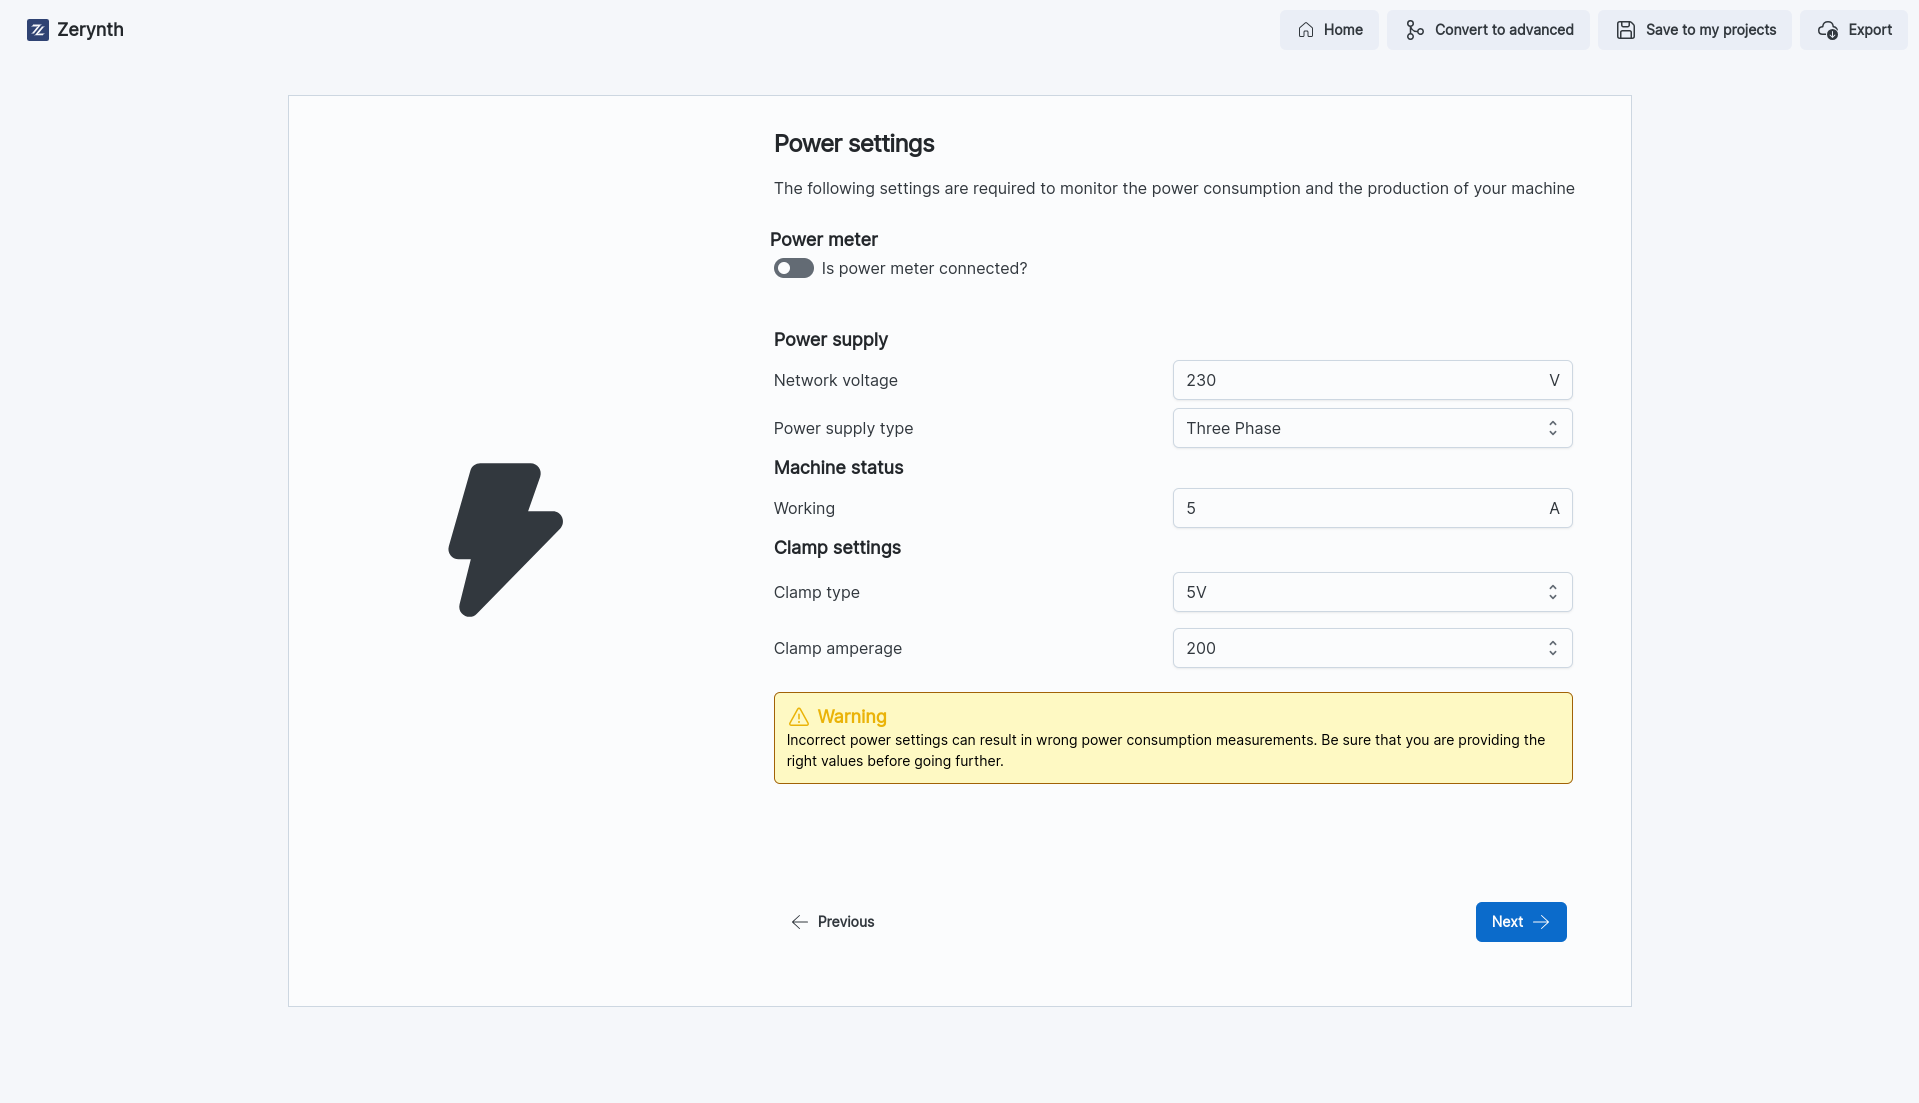
Power Settings: In this case we have to choose the power settings of our device. We can choose if our device is connected to a Power Meter or not. Those settings are used to calculate the energy consumption of the machine.
-
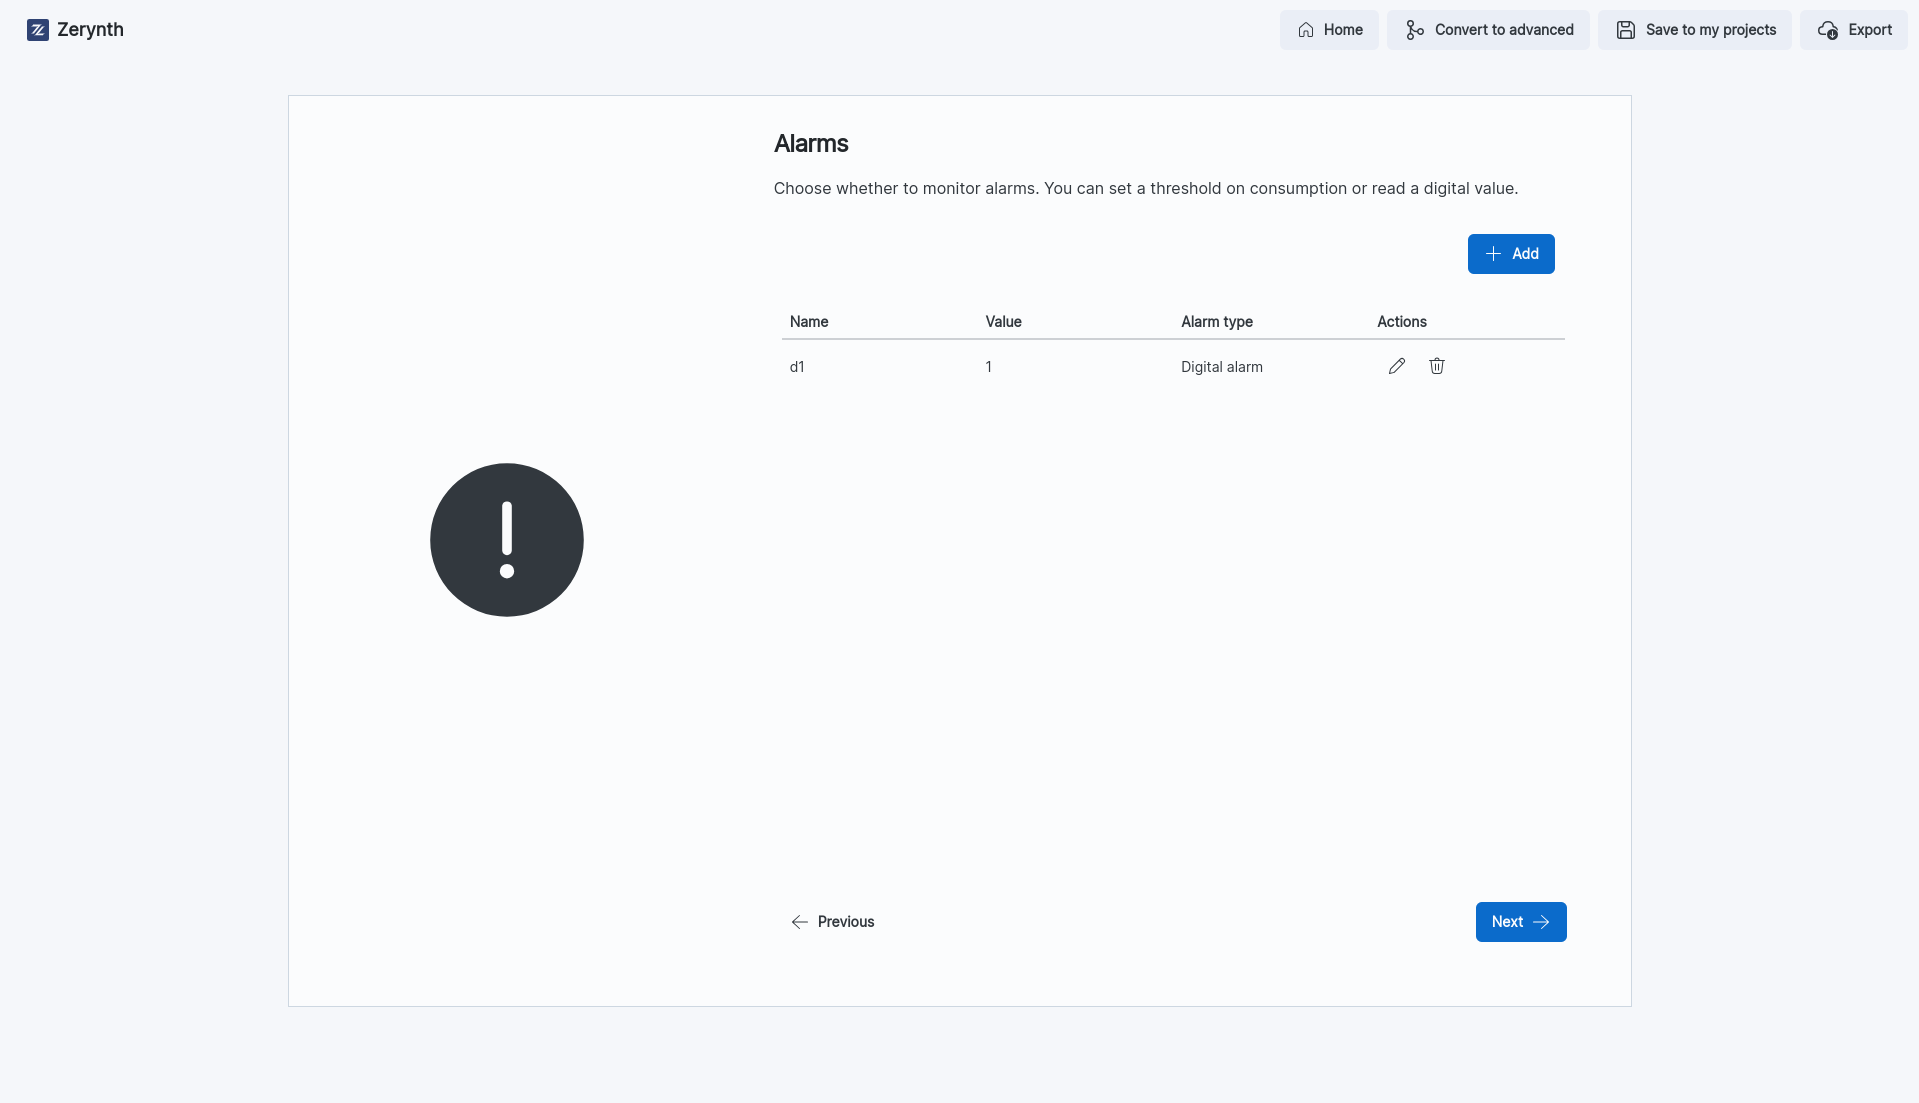
Alarm Settings: In this step we can choose the alarm settings of our device. We can add an alarm to the configuration by clicking on the New button in the top right corner, and then we can choose the type of alarm that we want to add, choosing between a digital alarm or a Threshold type alarm.
-
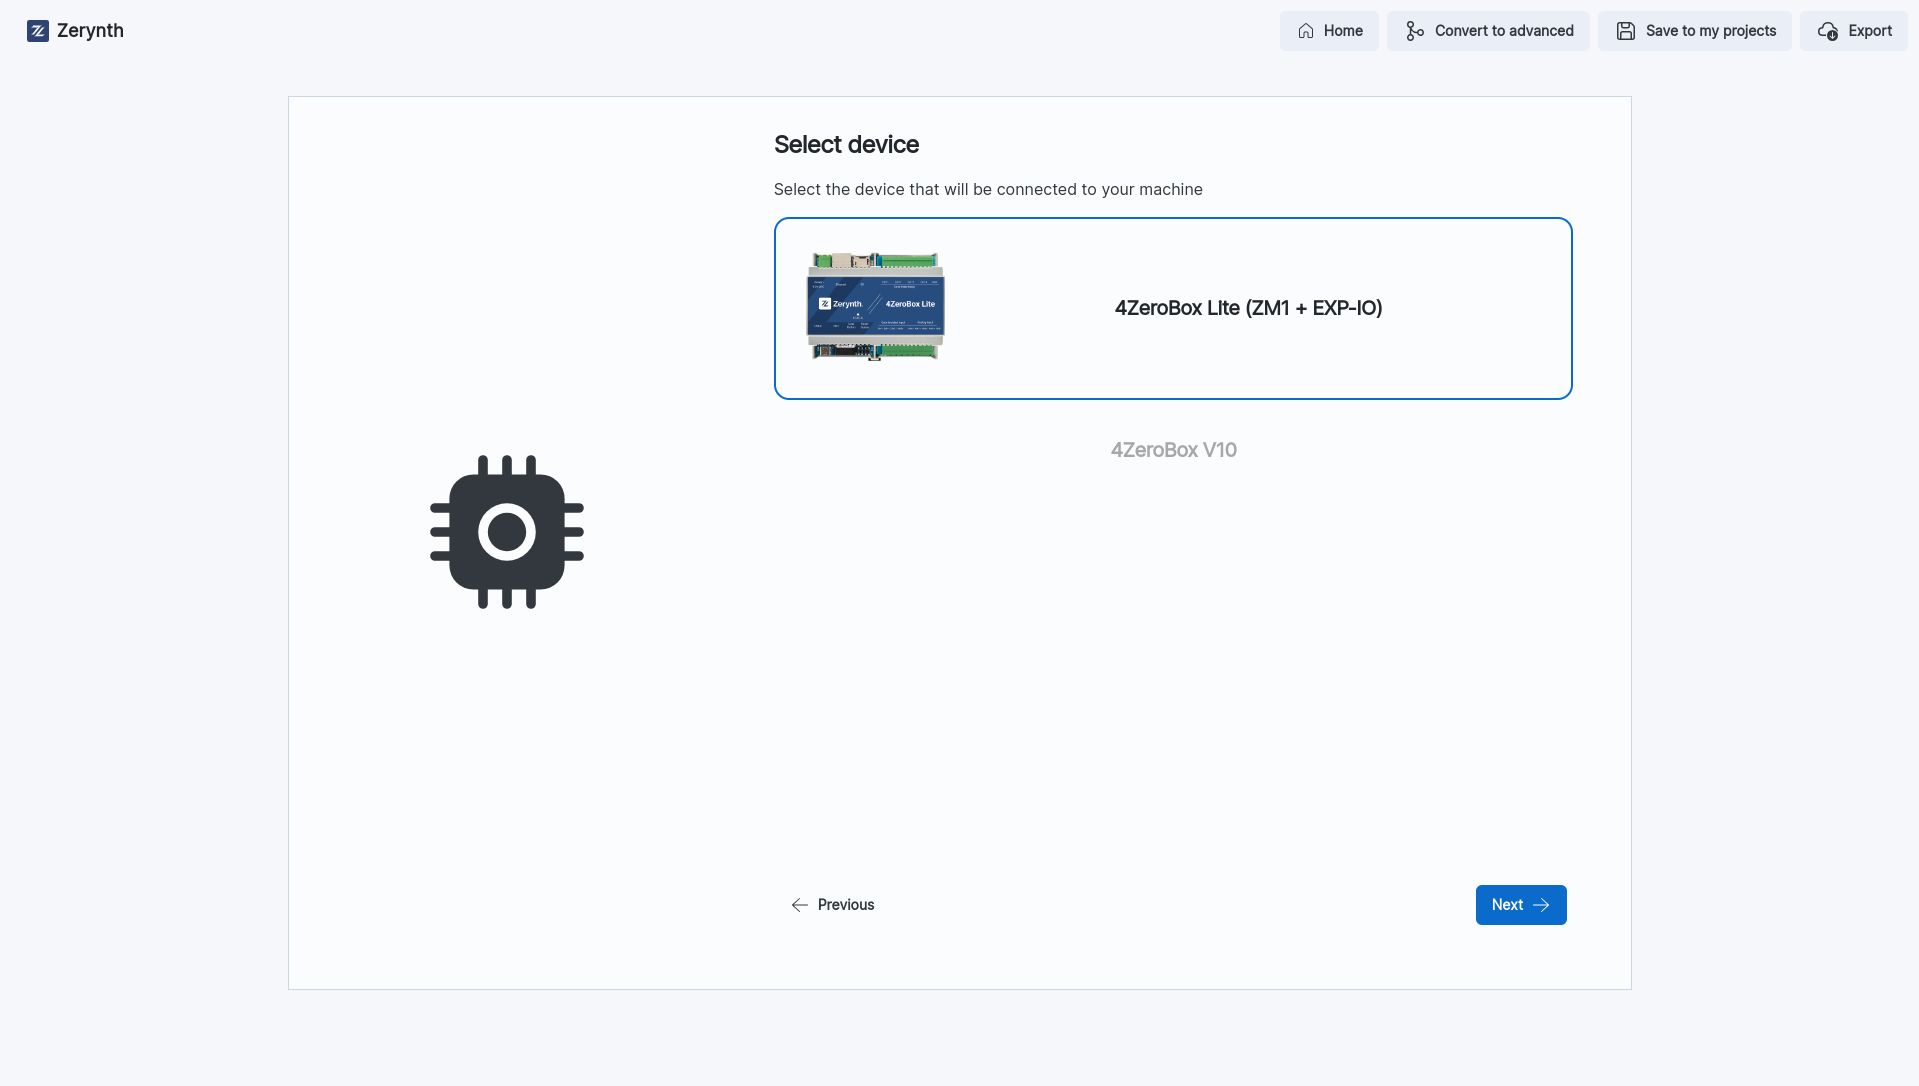
Select Device: Here we can choose which device we want to configure, and connect to the machine. In this case the only available option is the 4ZeroBox Lite (ZM1 + EXP-IO)
-
Network Configuration: Here you can configure which network you want to use to connect your device to the platform. In this case we choose the Wi-fi option. Then we have to set the Wi-fi settings of our device. Is it also possible to add one or more backup networks, in case the main network is not available.
-
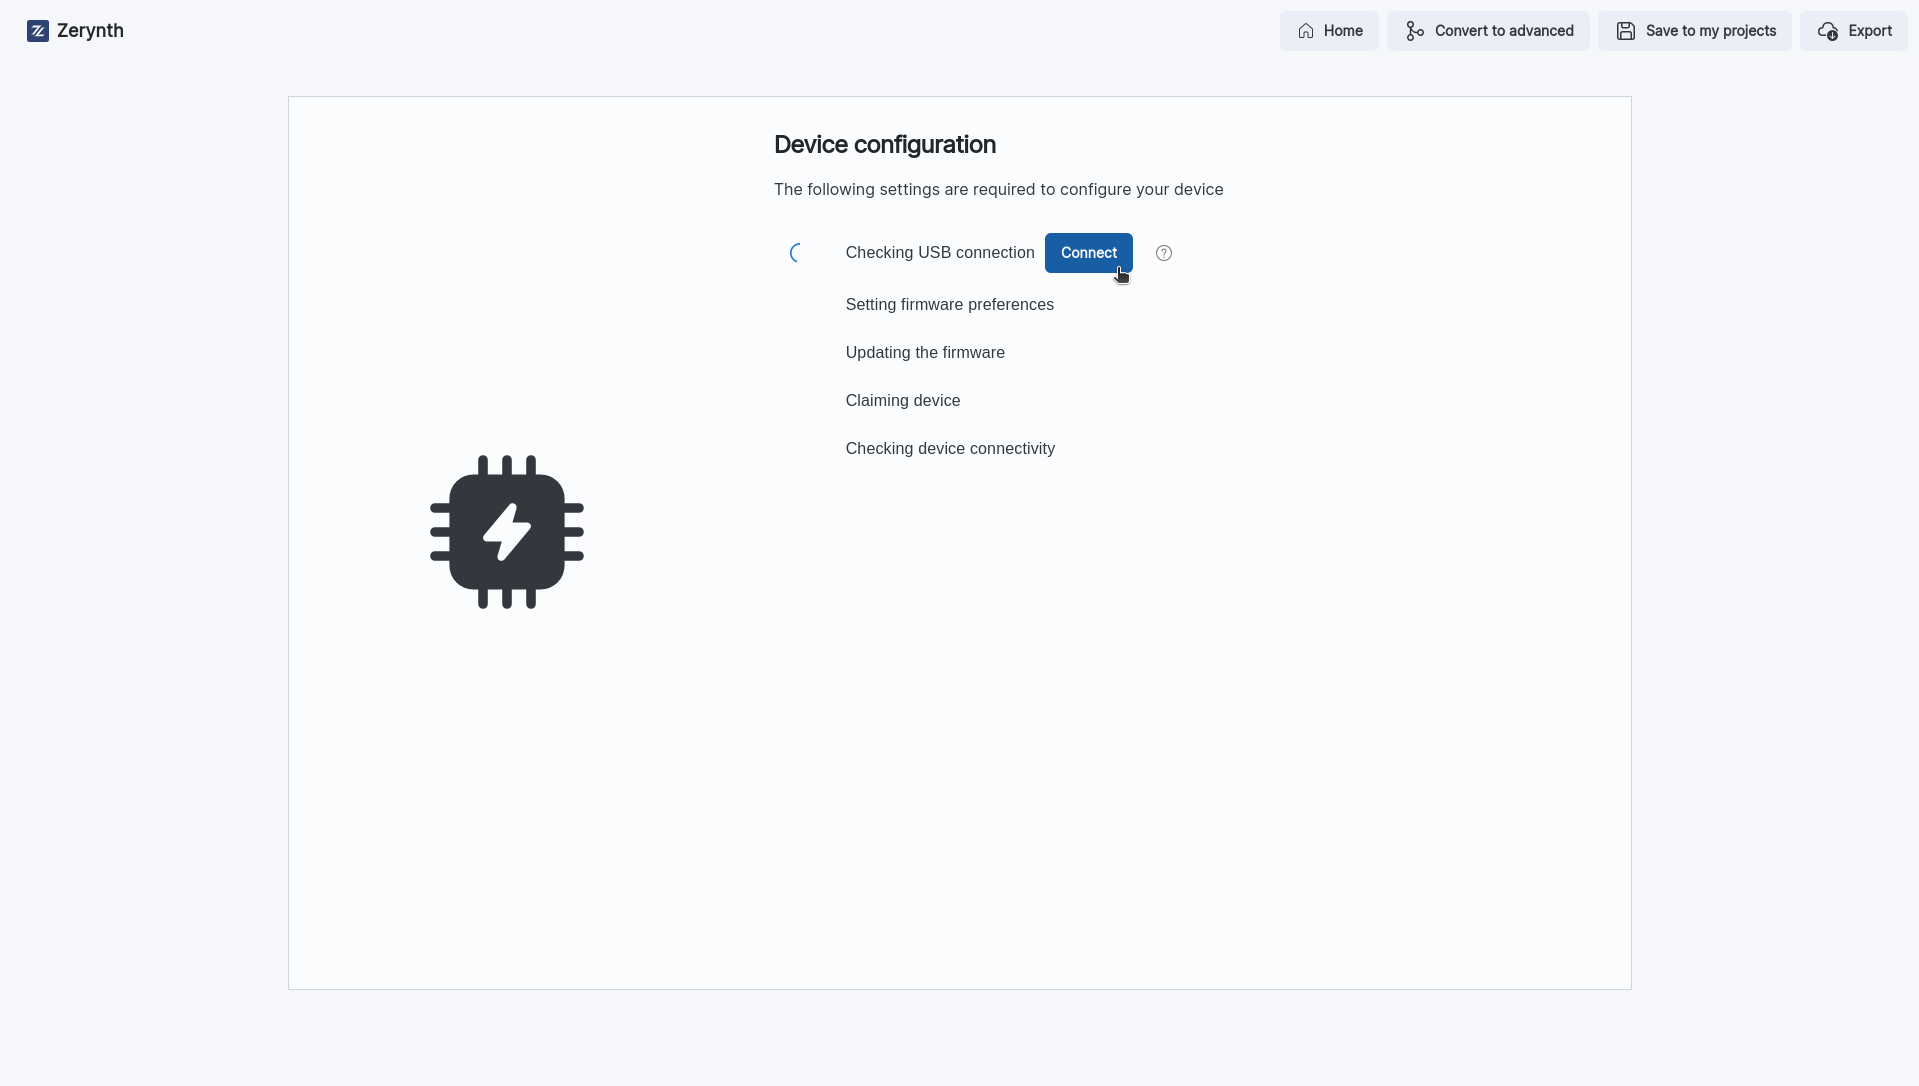
Configure your Device: Finally we can configure our device. By clicking the Connect Button it will appear a pop-up that allow us to select the serial port of our device. Then the configuration process will start and automatically configure the device. Once the configuration is completed, we can just go back to the overview page where we can see our device connected.
Download the PDF wiring guide here
Connection of Greenfield Machines
Let's explore the process of connecting a Greenfield Machine to the platform using an example.
Example: Configuring a greenfield machine
-
Select Template: For the configuration of a GreenField machine we can select the template Greenfield Production Opcua and Current Sensor
-
Name: as in the previous example, we have to choose the name that we want to assign to our device.
-
Select Device: Here we can choose which device we want to configure, and connect to the machine. In this case we choose 4ZeroAgent
-
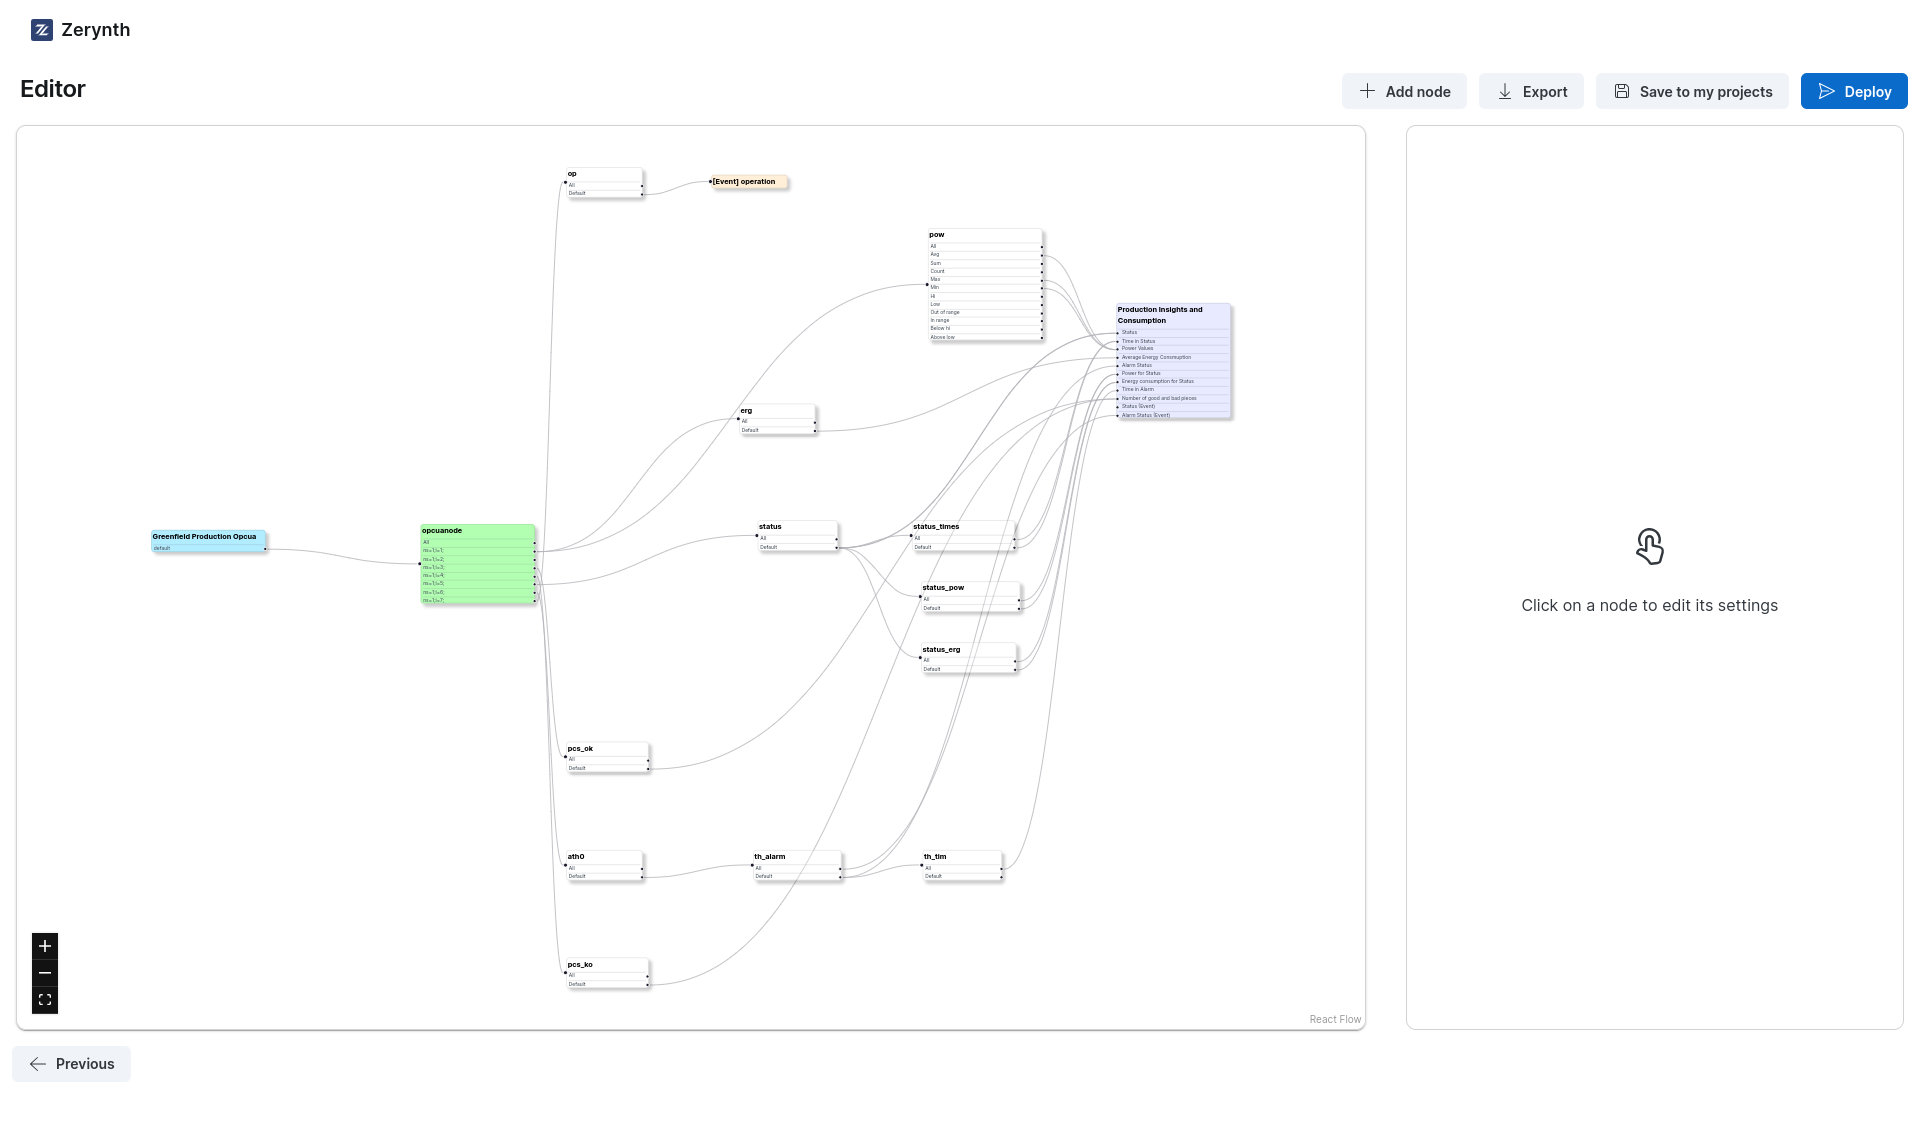
Graph Editor: this Template does not support the Wizard Mode, so we have to configure our device using the Graph Editor. The Graph Editor is a tool that allows you to configure your device in a more detailed way. It is composed by a series of nodes that you can connect to each other to create your configuration. Each node has a specific function, and you can configure it by clicking on it. You can also add new nodes by clicking on the + Add Node button in the top right corner of the page.
-
Edit Settings: Now we can edit the settings of our device by clicking the node we would like to edit.
In this case we can edit the opcua node settings, by clicking on it, and then edit the address field and the port field. After that we can click on the Save button on the bottom of the settings section.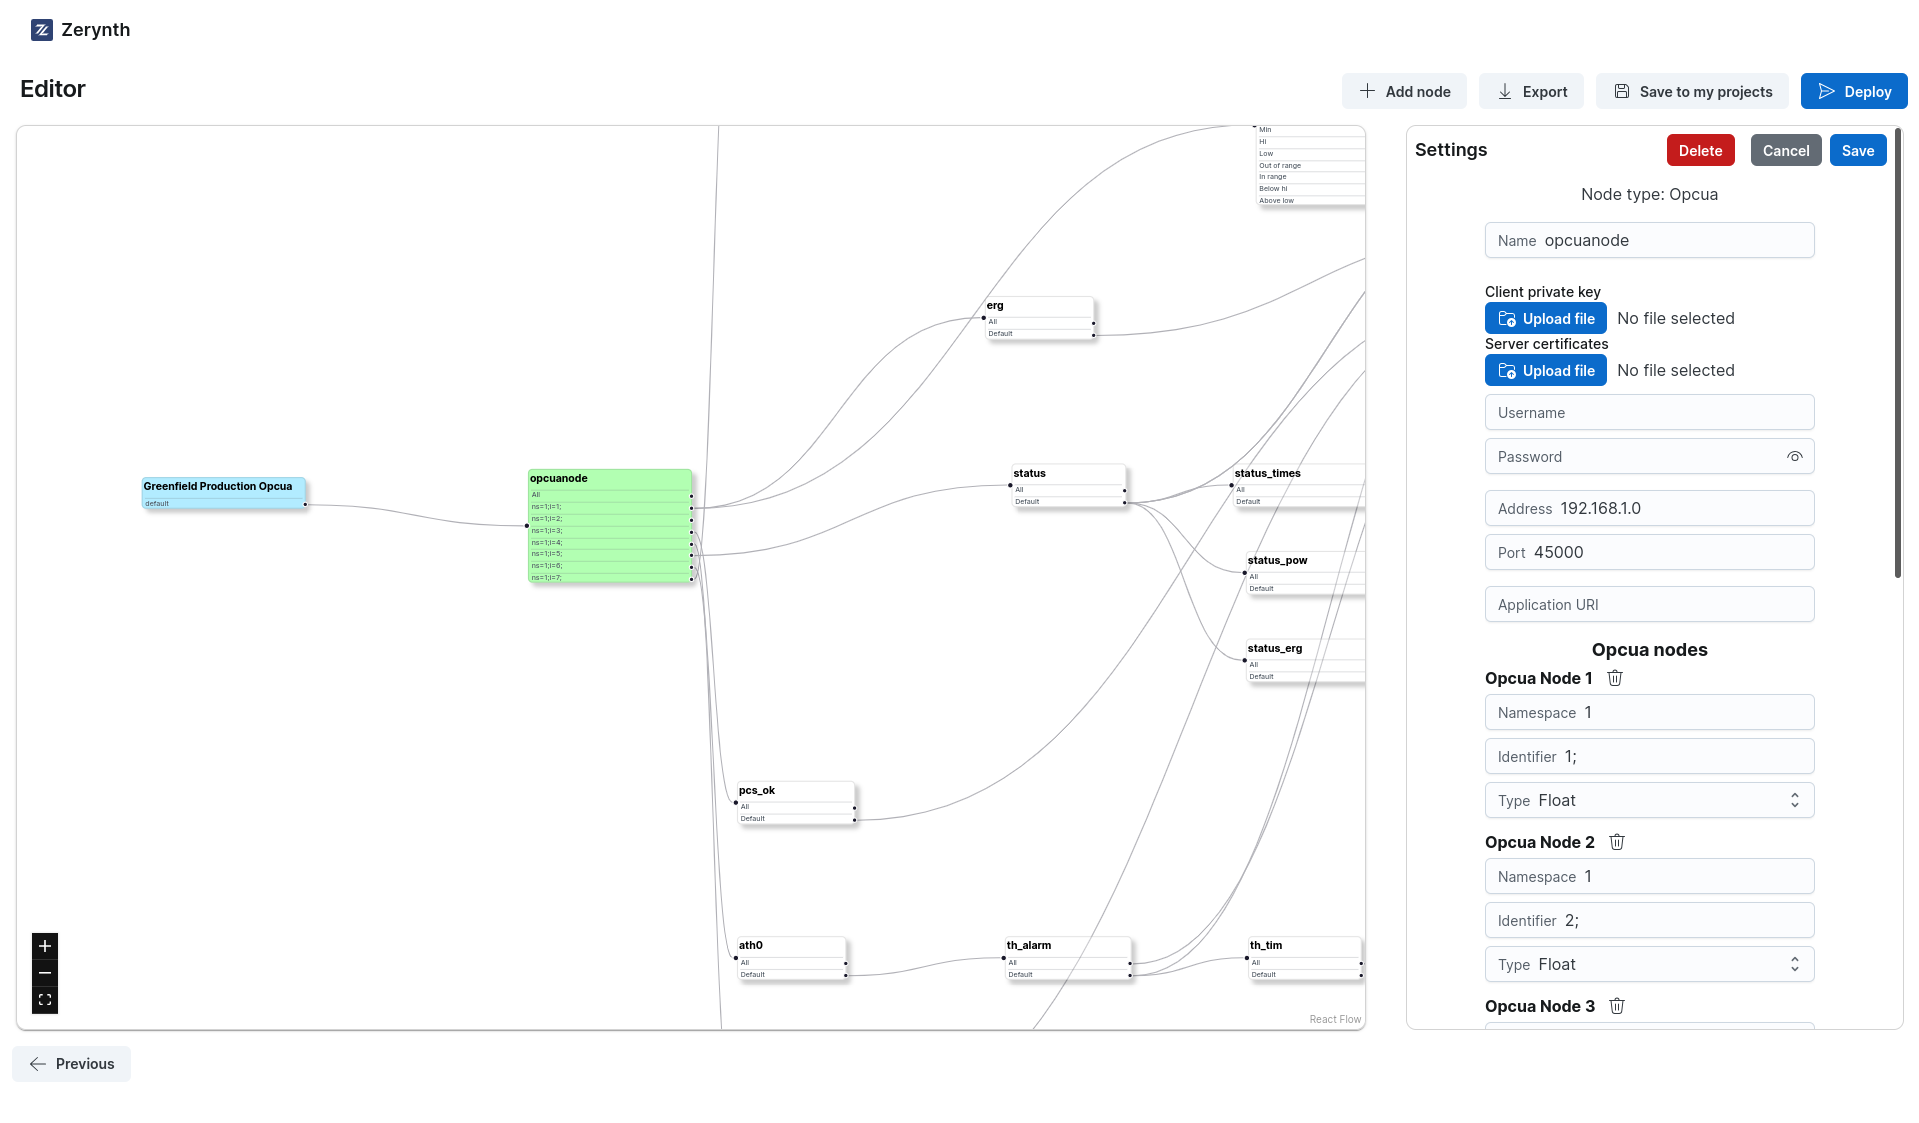 note
noteWe strongly recommend you to only edit the settings of the Green nodes, and not the other nodes.
-
Configure your Device: Finally we can configure our device, by selecting the serial port from the pop-up that appear when we click the Connect button.
Simulation of Greenfield Machines and connection via 4ZeroAgent
For this example the Zerynth Toolbox is also required. Download the Zerynth Toolbox and run it. This will allow using your PC to read data and signals from field machines you want to interface and to simulate greenfield machines by streaming OPC-UA data thanks to the integrated Server. You can find the complete documentation of the Zerynth Toolbox at the following link;
-
Start the simulator: launch the Zerynth Toolbox, open the PLC Simulator tab and start the OPC-UA simulator;
-
Select Template: for the configuration of a GreenField machine we can select the template Greenfield Production Opcua;
-
Name: as in the previous example, we have to choose the name that we want to assign to our device;
-
Graph Editor: this Template does not support the Wizard Mode, so we have to configure our device using the Graph Editor;
-
Edit opcua node: In the graph editor, select the opcuanode, by clicking on it, and insert the ip-address and port of the OPC-UA server created by the Zerynth Toolbox in the settings page:
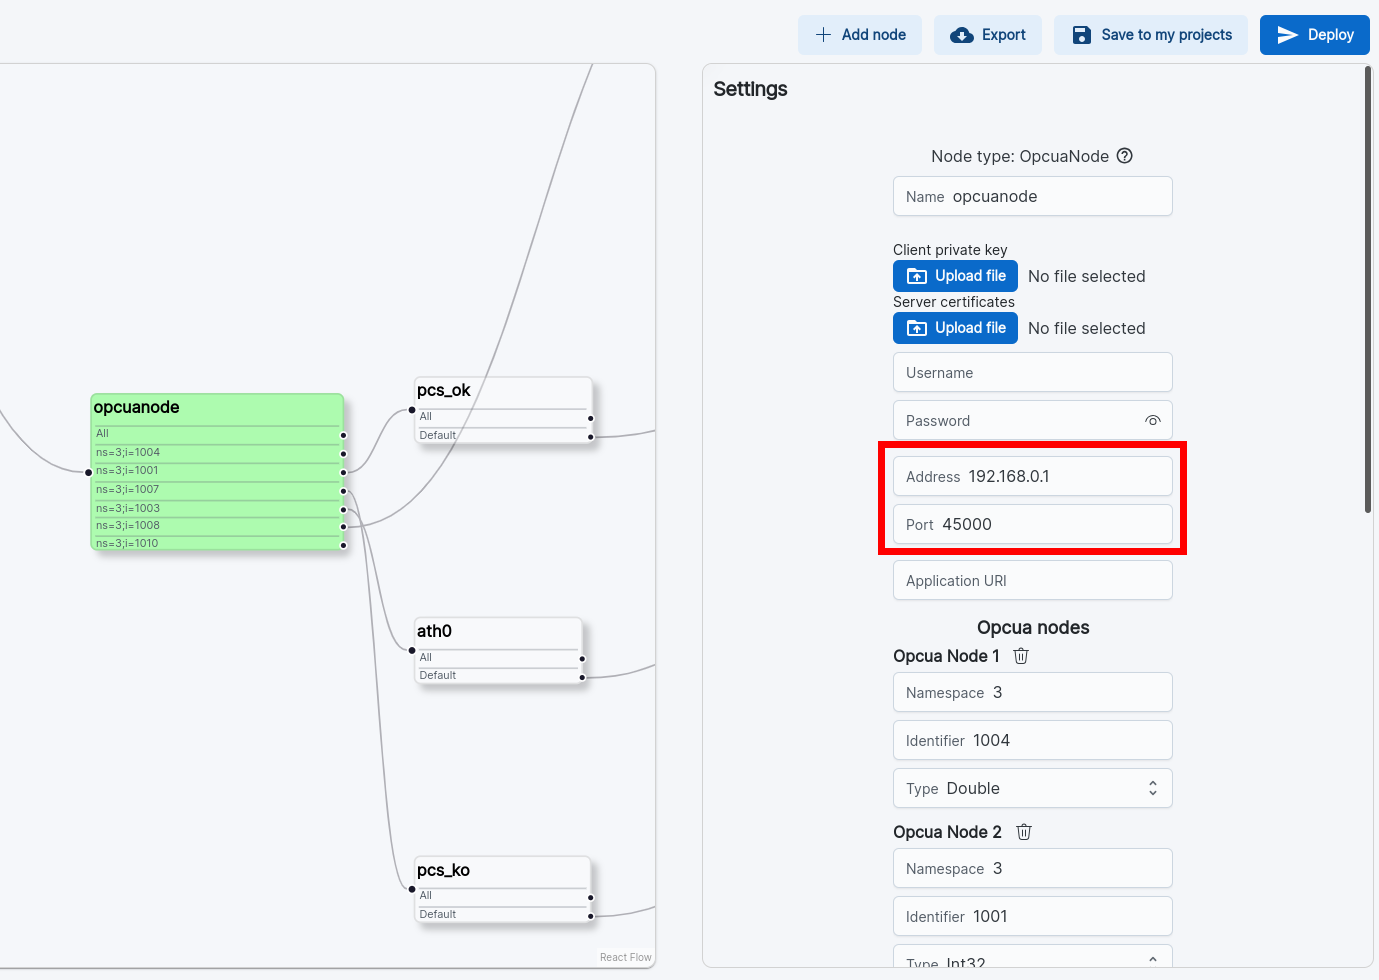
After that we can click on the Save button on the bottom of the settings section.
You can get the ip-address and port of your server from the Toolbox interface in the connection box.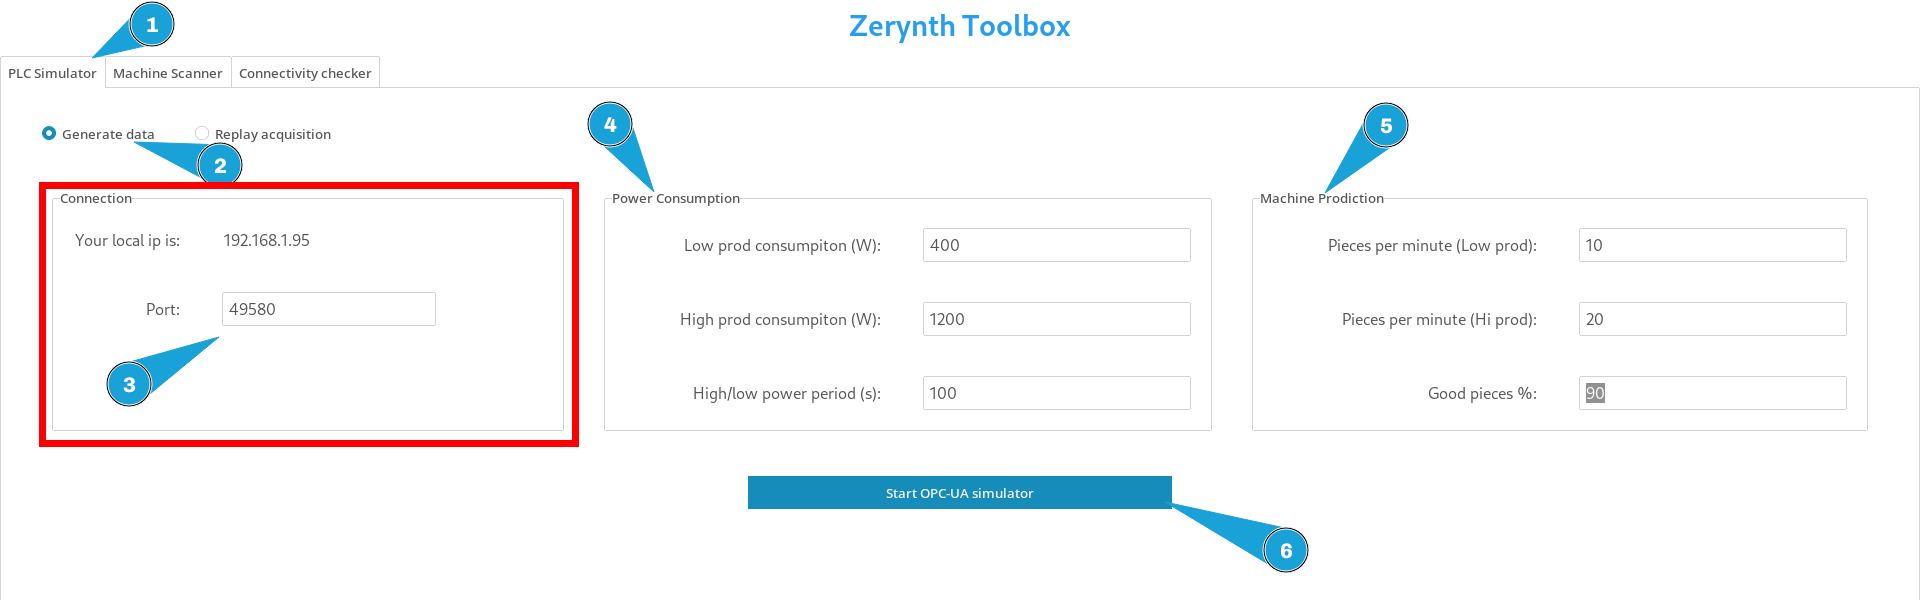
-
Deploy: Deploy you application for 4ZeroNode from the graph editor, this will generate a zipped ZAgent folder and allow you to download it:

-
Run Docker: if Docker is not running yet, run it;
-
Unzip 4ZeroAgent: unzip the 4ZeroAgent folder;
-
Run 4ZeroAgent: in the 4ZeroAgent folder, select
start.ps1and run it with PowerShell (right clickstart.ps1and selectRun with PowerShell). The ZAgent will connect to the cloud, start reading data from the OPC-UA server and publish the read data. Data should be visible on the machine page.notethe first time that
start.ps1is run it will also build the 4ZeroAgent application. This might require a couple of minutes to complete.